How to Apply Griot’s Garage Wheel Sealant
April 11, 2024 | by Rosie Dazzlers

Serving Norfolk and Oxford counties, Rosie Dazzlers Mobile Auto Detailing brings the shine right to your doorstep. With a commitment to unmatched convenience and quality, we specialize in making your vehicle dazzle. Whether you have a sedan or an SUV, trust us to deliver exceptional results.
At Rosie Dazzlers, we understand the importance of a professional finish for your vehicle. That’s why we are here to guide you on how to apply Griot’s Garage Wheel Sealant. Our step-by-step guide, best practices, and expert advice will ensure a flawless application and optimal protection for your wheels.
With our detailed instructions and reliable techniques, you can experience the perfect balance of convenience and quality. Transform the appearance of your wheels and enjoy lasting protection with Griot’s Garage Wheel Sealant. Let us take care of your vehicle and make it shine like never before. Call now and let your car sparkle!
Key Takeaways:
- Experience the convenience and quality of Rosie Dazzlers Mobile Auto Detailing.
- Trust our expertise to make your vehicle dazzle with Griot’s Garage Wheel Sealant.
- Follow our step-by-step guide for a flawless application and optimal protection.
- Enjoy the convenience of professional auto detailing services at your doorstep.
- Let Rosie Dazzlers transform the appearance and shine of your wheels.
Gather the Necessary Materials
Before you start applying Griot’s Garage Wheel Sealant, it’s important to gather all the necessary materials. You will need the following:
| Materials |
|---|
| Griot’s Garage Wheel Sealant |
| Microfiber towels |
| Wheel cleaner |
| Wheel brush |
These materials are essential for properly cleaning and preparing your wheels for the sealant application.
Now, let’s dive into each item in more detail:
- Griot’s Garage Wheel Sealant: This high-quality sealant provides long-lasting protection for your wheels, keeping them looking their best.
- Microfiber towels: These soft and absorbent towels are perfect for gently wiping and drying your wheels without scratching the surface.
- Wheel cleaner: Choose a wheel cleaner specifically designed to remove brake dust, dirt, and grime from your wheels. Ensure it is safe for the type of wheels you have.
- Wheel brush: A wheel brush with soft bristles is ideal for reaching the nooks and crannies of your wheels, effectively removing dirt and debris.
By having these materials on hand, you’ll be fully prepared to clean and protect your wheels with Griot’s Garage Wheel Sealant.

Clean and Prepare the Wheels
Before applying Griot’s Garage Wheel Sealant, it’s crucial to clean and prepare your wheels properly. This will ensure that the sealant adheres correctly and provides long-lasting protection. Follow these steps to clean and prepare your wheels:
- Start by using a wheel cleaner and a wheel brush to remove any dirt, grime, or brake dust from the surface of the wheels. Gently scrub the wheels using the wheel brush, paying close attention to hard-to-reach areas.
- Rinse off the wheel cleaner thoroughly to remove any residue. This step is essential to prevent the wheel cleaner from interfering with the sealant’s effectiveness.
- Use a microfiber towel to dry the wheels completely. Make sure the wheels are free of any moisture before proceeding to the next step.
Properly cleaning and preparing the wheels is crucial because any dirt or debris left on the surface can prevent the sealant from bonding correctly. This can compromise the longevity and effectiveness of the sealant.
For a visual guide on cleaning and preparing wheels, refer to the following table:
| Materials | Usage |
|---|---|
| Wheel cleaner | Cleans and removes dirt, grime, and brake dust from the wheels. |
| Wheel brush | Helps scrub and remove dirt, grime, and brake dust from hard-to-reach areas of the wheels. |
| Microfiber towel | Dries the wheels completely, ensuring they are free of moisture before applying the sealant. |
By thoroughly cleaning and preparing your wheels, you can ensure optimal adhesion and long-lasting protection of Griot’s Garage Wheel Sealant.
Apply Griot’s Garage Wheel Sealant
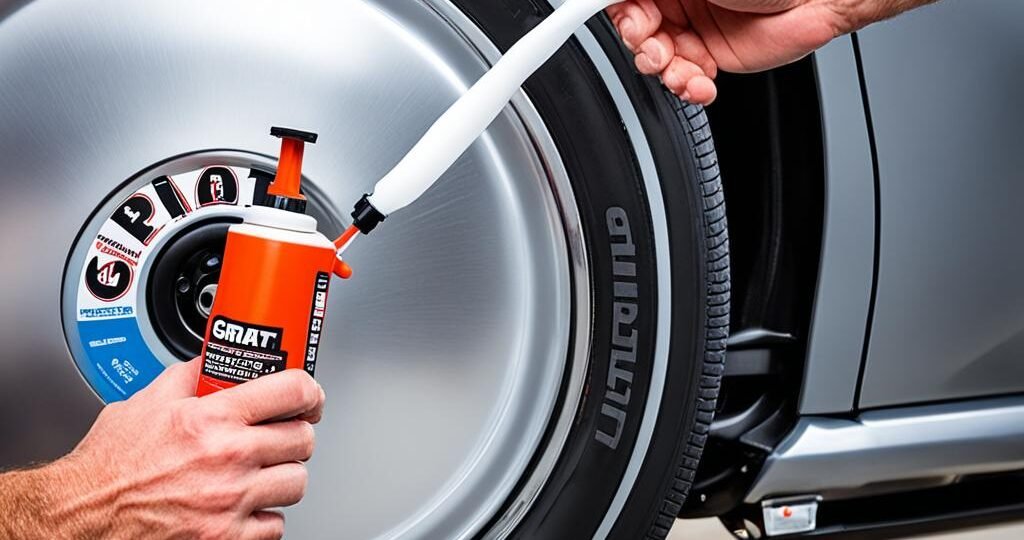
Once your wheels are clean and dry, it’s time to apply Griot’s Garage Wheel Sealant. The Griot’s Garage Wheel Sealant is a high-quality product designed to provide long-lasting protection and a glossy finish to your wheels. To ensure optimal results, follow these step-by-step instructions.
Gather the Necessary Materials
Before you begin the application process, gather all the necessary materials. This includes:
- Griot’s Garage Wheel Sealant
- Microfiber applicator pad
- Clean, lint-free microfiber towels
Having these materials ready will help you achieve the best results and ensure even distribution of the sealant.
Prepare the Wheels
Thoroughly clean and dry your wheels before applying the sealant. Use a wheel cleaner and a wheel brush to remove any dirt, grime, or brake dust. Once cleaned, dry the wheels with a microfiber towel to ensure no moisture remains on the surface.
Pro Tip: Rosie Dazzlers Mobile Auto Detailing recommends using a pH-neutral wheel cleaner to protect the wheel’s finish.
Application Process
Follow these steps to apply Griot’s Garage Wheel Sealant:
- Squeeze a small amount of sealant onto the microfiber applicator pad. A little goes a long way.
- Apply the sealant in an even coat onto the wheel’s surface, covering the entire area. Start from the top and work your way down.
- Using circular motions, work the sealant into the wheel’s surface. This ensures thorough coverage and helps the sealant bond to the wheel.
- Repeat the process for each wheel, applying the sealant in the same manner.
- Let the sealant dry according to the manufacturer’s instructions before moving on to buffing and polishing.
Following these steps will result in a smooth and even application, providing your wheels with maximum protection against contaminants and improving their overall appearance.
Cleaning Up
After applying the sealant to all your wheels, clean up any excess product with a clean, lint-free microfiber towel. This ensures a clean finish and avoids any unwanted residue.
Expert Advice
“When applying Griot’s Garage Wheel Sealant, remember to work in shaded areas and avoid direct sunlight. This will prevent the sealant from drying too quickly, allowing you ample time to work it into the wheel’s surface.” – Rosie Dazzlers Mobile Auto Detailing
Pros and Cons of Griot’s Garage Wheel Sealant
| Pros | Cons |
|---|---|
| Provides long-lasting protection | Requires thorough cleaning and preparation |
| Enhances the appearance of wheels | Can be time-consuming |
| Easy to apply with a microfiber applicator pad | May require multiple coats for optimal results |
| Protects against brake dust and other contaminants | Higher cost compared to some other sealants |
In conclusion, applying Griot’s Garage Wheel Sealant is a simple and effective way to protect and enhance the appearance of your wheels. By following the step-by-step instructions and using the right materials, you can achieve a professional finish and ensure lasting protection for your wheels. Trust the expertise of Rosie Dazzlers Mobile Auto Detailing for all your wheel sealant needs.
Allow the Sealant to Cure
After applying Griot’s Garage Wheel Sealant, it’s crucial to allow the sealant to cure properly. Following the manufacturer’s instructions for the recommended drying time is essential to ensure that the sealant fully bonds to the wheel’s surface and provides optimal protection. During this curing process, it is vital to avoid touching or driving the vehicle to prevent compromising the finish.
Recommended Drying Time for Griot’s Garage Wheel Sealant
| Material | Recommended Drying Time |
|---|---|
| Griot’s Garage Wheel Sealant | 4-6 hours |
Every manufacturer may have different instructions for the drying time, so it’s crucial to follow the specific guidelines provided by Griot’s Garage. Giving the sealant enough time to cure will ensure maximum effectiveness in providing long-lasting protection for your wheels.
During the drying period, it’s important to keep the vehicle in a clean and well-ventilated area. This will prevent any dust or debris from settling on the freshly applied sealant, which could impact the quality of the finish.
Once the recommended drying time has passed, it’s advisable to inspect the wheels carefully to ensure the sealant has fully cured. Before handling or touching the wheels, perform a gentle touch test in a discreet area to confirm that the sealant is no longer tacky or soft.
Allowing the sealant to cure completely is a crucial step in the application process. By following the manufacturer’s instructions and being patient during the drying time, you can ensure that your wheels are effectively protected and ready to shine.
“Properly allowing the sealant to cure is essential for achieving optimal protection and ensuring long-lasting results for your wheels.”
Buff and Polish the Wheels
Once the sealant has cured, it’s time to give your wheels an exquisite finish by buffing and polishing them. This step will not only enhance the shine of your wheels but also remove any excess sealant, leaving behind a flawless appearance.
Using a microfiber towel, gently buff the wheels in circular motions. This will help eliminate any residue and bring out the natural luster of the wheel’s surface. Be sure to pay attention to every nook and cranny for a thorough cleaning.
If you desire a more intensive refinishing and restoration of the wheel’s surface, we recommend using Griot’s Garage Complete Compound and Griot’s Garage Complete Polish. These products are specially formulated to remove fine scratches, oxidation, and other imperfections, resulting in a smooth and glossy finish.
Apply the compound using a clean microfiber towel and work it into the wheel’s surface using gentle pressure. Follow up with Griot’s Garage Complete Polish to further enhance the shine and refine the wheel’s appearance. Remember to follow the manufacturer’s instructions for optimal results.
By buffing and polishing the wheels, you’ll achieve a professional-grade finish that will make your vehicle stand out. The combination of proper sealant application and meticulous polishing will ensure that your wheels look their absolute best.
| Benefits of Buffing and Polishing the Wheels | Tools and Products |
|---|---|
| Enhances the shine and brightness of the wheels | Microfiber towel |
| Removes excess sealant for a flawless finish | Griot’s Garage Complete Compound |
| Restores and refines the wheel’s surface | Griot’s Garage Complete Polish |
| Provides a professional-grade appearance |
Conclusion
In conclusion, applying Griot’s Garage Wheel Sealant is a simple and effective way to protect and enhance the appearance of your wheels. At Rosie Dazzlers Mobile Auto Detailing, we highly recommend using Griot’s Garage Wheel Sealant for its professional finish and lasting protection.
By following our detailed instructions and using the recommended techniques, you can achieve a flawless and long-lasting result. Griot’s Garage Wheel Sealant provides a durable barrier against contaminants, brake dust, and harmful UV rays, ensuring that your wheels stay in top condition for longer periods of time.
For optimal results, it is crucial to properly clean and prepare your wheels before applying the sealant. Our step-by-step guide and detailed instructions will give you the knowledge and confidence to achieve a showroom-worthy finish.
Don’t hesitate to try Griot’s Garage Wheel Sealant today and experience the difference it can make in maintaining the beauty and integrity of your wheels.
FAQ
How do I apply Griot’s Garage Wheel Sealant?
To apply Griot’s Garage Wheel Sealant, start by gathering the necessary materials, including Griot’s Garage Wheel Sealant, microfiber towels, a good quality wheel cleaner, and a wheel brush. Thoroughly clean and prepare the wheels using a wheel cleaner and brush. Once the wheels are dry, apply the sealant using a microfiber applicator pad in an even coat, working it into the surface in circular motions. Allow the sealant to cure according to the manufacturer’s instructions before buffing and polishing the wheels for an enhanced shine.
What materials do I need to apply Griot’s Garage Wheel Sealant?
To apply Griot’s Garage Wheel Sealant, you will need Griot’s Garage Wheel Sealant, microfiber towels, a good quality wheel cleaner, and a wheel brush. These materials will ensure that you have everything you need to properly clean and prepare your wheels for the sealant application.
How do I clean and prepare my wheels before applying Griot’s Garage Wheel Sealant?
To clean and prepare your wheels before applying Griot’s Garage Wheel Sealant, use a wheel cleaner and a wheel brush to remove any dirt, grime, or brake dust from the surface of the wheels. Use a microfiber towel to dry the wheels completely before moving on to the next step. Properly cleaning and preparing the wheels will ensure that the sealant adheres properly and provides long-lasting protection.
How should I apply Griot’s Garage Wheel Sealant?
To apply Griot’s Garage Wheel Sealant, use a microfiber applicator pad to apply the sealant in an even coat, covering the entire surface of each wheel. Work the sealant into the wheel’s surface using circular motions. Be sure to follow the manufacturer’s instructions for the proper amount of sealant to apply. This will ensure that you achieve the best results and maximum protection for your wheels.
How long should I allow the sealant to cure?
The drying time for Griot’s Garage Wheel Sealant may vary. It is essential to follow the manufacturer’s instructions for the recommended drying time. This will ensure that the sealant fully bonds to the wheel’s surface and provides optimal protection. Avoid touching or driving the vehicle until the sealant has fully cured to avoid compromising the finish.
How do I buff and polish the wheels after applying Griot’s Garage Wheel Sealant?
After applying Griot’s Garage Wheel Sealant, use a microfiber towel to gently buff the wheels, removing any excess sealant and bringing out the shine. If desired, you can also use Griot’s Garage Complete Compound and Griot’s Garage Complete Polish for further refinishing and restoration of the wheel’s surface. This step will provide a professional finish and ensure that your wheels look their best.
Source Links
RELATED POSTS
View all


