In our shared studio, where creativity’s murmur is ever-present, we confront our unique dragons. My partner endures a daily battle with mental illness – agoraphobia, anxiety, and depression – while life’s dance navigates me through the unpredictability of osteoporosis. But within this space where challenges cast long shadows, we clutch tightly to love and our art. They are not merely hobbies but the weapons with which we face our trials. With each crafting with resin, we wield resilience beyond the physical – an enduring resilience of spirit.
Together, we carve out a haven in our art, transforming hurdles into strokes of creative enterprise. Our journey may be gruelling, but it’s within this artistic forge that we find our collective light, our unyielding strength. Crafting flawless resin projects isn’t just a pastime; it’s our shared language of healing and expression. Come join us in this therapeutic odyssey at www.devilndove.com, and witness how resin mixing techniques can shape more than just materials, but also fortify spirits and bond lives intertwined with care.
Key Takeaways
- Love and art can be powerful tools in facing personal challenges.
- Crafting with resin offers not just creative satisfaction, but therapeutic benefits.
- Resilience is crafted from both the physical and spiritual elements of our being.
- Understanding resin mixing techniques is essential for creating flawless resin projects.
- Our studio is a sanctuary where life’s difficulties are met with creativity and unity.
Understanding the Basics of Resin Components
Embarking on a crafting journey with epoxy resin components involves getting to know the primary substances that bring your creations to life. As we delve into the world of resin crafting, we recognize two pivotal elements that form the backbone of every resin project: Part A and Part B. These components play a significant role in the crafting process and must be handled with care and precision to achieve the desired results.
Identifying Part A and Part B of Resin
When you open your resin kit, you’ll find two distinct solutions that serve different functions. Part A, the resin itself, is a viscous liquid that forms the transparent and glossy base of your craft. Part B, the hardener, acts as a catalyst, triggering the chemical reaction that transforms the liquid resin into a solid, enduring piece. Both are crafting essentials and their symbiotic relationship cannot be understated. Once combined in precise proportions, they pave the way for endless creative potential.
Exploring the Different Types of Resin for Various Projects
Resin types cater to a spectrum of artistic applications, from encapsulating delicate flowers in jewelry to creating robust tabletops that stand the test of time. While some epoxy resins are designed to achieve depth in larger molds, others boast a refined formula that accentuates the subtleties of smaller crafts. For our purpose, we’ll concentrate on the Amazing Clear Cast Resin, a popular choice among crafters for its user-friendly 1 to 1 ratio and generous 30-minute work time. Its versatility and ease of use make it an indispensable crafting essential for both novices and seasoned artists alike.
Whether you’re a beginner eager to mold your first set of coasters or an experienced artist casting intricate sculptures, understanding these epoxy resin components and their applications is the first step towards mastering the craft of resin. So, let’s raise our stir sticks and pour our creative energies into creating something truly amazing.
Getting Started: Preparing Your Workspace
Before diving into resin crafting, the cornerstone of a successful project is thoughtful resin workspace preparation. It sets the stage not only for our creativity to flourish but also for maintaining safety in resin crafting. To us, every piece is a fusion of artistry and precaution, ensuring both beauty and well-being coexist in harmony.
Selecting the Right Environment for Resin Work
The initial step is carving out a sanctuary for your craft—a well-ventilated space, crucial for mitigating resin fumes. We prefer areas with steady airflow or use fans to disperse vapors, an essential practice for every resin enthusiast’s health. Having windows open and working in a spacious room or garage can significantly reduce exposure and enhance our respiratory protection.
Gathering Essential Tools and Safety Gear
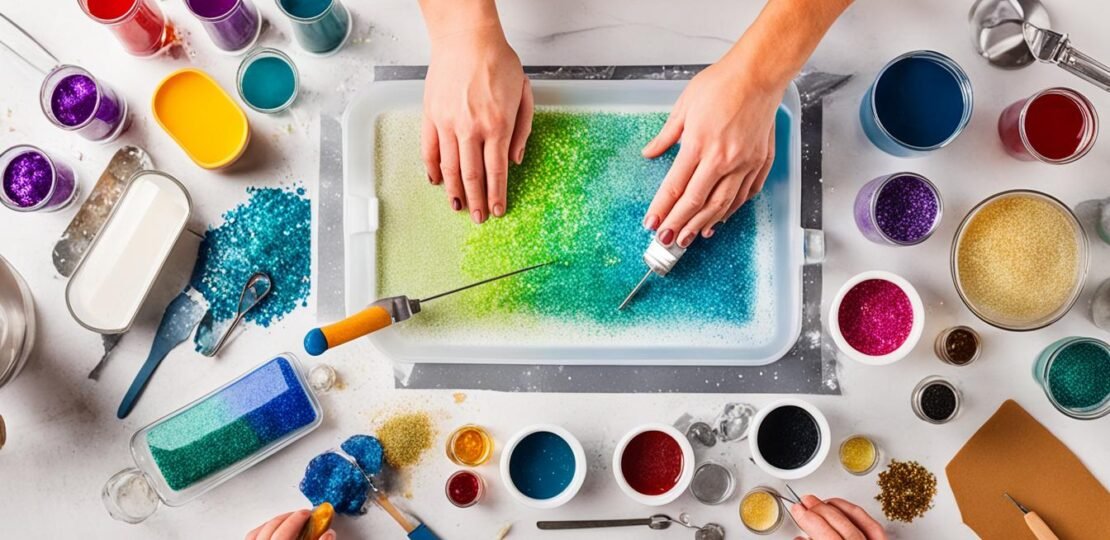
Gathering our crafting arsenal is part of the ritual. Silicone molds outline our future creations, while a heat gun and mixing cups stand ready at our side. Donning gloves, we transform into artisans of the form. Should any task demand a sprinkle of pizzazz, inclusions like glitter or colorful flakes await their stage call.
As resin demands patience to achieve perfection, we lay down freezer paper onto a baking pan—our canvas and vessel. This not only simplifies prep and cleanup but also ensures a smooth transition to the spot where our artwork will cure undisturbed, a testament to our craft’s dedication.
The Importance of Accurate Measuring
As we delve into the world of crafting with epoxy resin, one truth becomes evident: the success of our projects hinges on epoxy resin measuring and precise resin mixing. Whether we’re striving for intricate jewelry or seamless table tops, the quest for achieving perfect resin consistency is universal amongst crafters. Let us explore together the pivotal steps that transform our creative endeavors from mere visions into tangible art.
To ensure precision, clean tools are our allies. They are the foundation to guarantee that our measurements lead to the desired outcome. The weight of our components offers us a method for accuracy, with digital scales becoming the guardians of ratio correctness. On the other hand, graduated cylinders stand tall, beckoning those who prefer the route of volume. It is imperative to remember that the densities of epoxy and hardener differ; hence, their weight ratio will not mirror their volume ratio.
- Weighing with digital scales for meticulous accuracy
- Graduated cylinders for precise volume measures
- Awareness of different densities of resin and hardener
Adhering closely to the guidance of the chosen resin brands is not just a recommendation—it’s a beacon leading us to the shores of successful crafting. Should we waver in our measurements, we risk the perils of improper curing, a tribulation all too familiar yet entirely avoidable with the right focus and techniques.
“In the delicate dance of mixing resin, it is the balance of precision and patience that leads to unparalleled beauty.”
Now, let us visualize this process; imagine the resin and the hardener merging in perfect harmony, calibrated to perfection by the scales, their unity promising a flawless structure.
So, we gather around our workspaces, armed with the knowledge that accurate measuring is not just a step in the process—it is the cornerstone upon which the integrity of our resin art rests. Together, with every precise measurement, we are not just creating; we are invoking reliability and grace into our artwork.
Mixing Your Resin: Techniques for a Perfect Blend
As artisans, we understand the importance of achieving that perfect resin mix. Mastery of resin mixing steps is essential in creating stunning, clear, and durable pieces. Now that we’ve measured our components accurately, it’s time to fuse them together—where the magic really begins.

Avoiding resin errors is just as crucial as the mixing itself. To ensure a flawless finish, stick with us as we delve into the mixing process.
The Role of Mixing Containers and Sticks
Choice matters—even when it’s about selecting the right mixing containers and sticks. A clear container is your window to success, allowing us to spot any streaks that indicate incomplete mixing. As for sticks, make it a rigid one with a flat edge to scrape the sides clean and merge the parts homogenously.
How to Avoid Common Mixing Mistakes
Here are some tips to keep those dreaded mixing mishaps at bay:
- Gentle Stirring: Mix gently but thoroughly to prevent air entrapment.
- Consistency Is Key: After combining the two parts, transfer the mixture to a second container and stir once more. This step might seem redundant, but it’s the secret to that uniform, bubble-free product we all covet.
- Patience Pays Off: While the inclination might be to rush, patience ensures your hard work doesn’t go to waste.
And there you have it—your path to a perfect resin mix. By avoiding resin errors and adopting these sure-fire resin mixing steps, you’re poised to take your projects from good to breathtaking.
Employing the Correct Resin to Hardener Ratios
As seasoned craftsmen, we understand that the key to a magnificent resin creation lies in the precise resin hardener ratio. It’s a careful dance of chemistry where knowing the character of your epoxy system—be it the resin brand specifics or the nuances of volume versus weight mixing—is crucial. Let’s delve into understanding the complexities of these ratios to ensure our resin projects set with impeccable clarity and durability.
Understanding Ratio Differences Between Resin Brands
Each resin brand on the market—like Super SAP CLR or ArtResin—may have its unique mix ratio by weight or volume. This isn’t just trivial details; it’s critical information that, when heeded, leads to stunning and structurally sound pieces. We must respect these prescribed ratios to avoid any disappointment after the curing stage. After all, precision is not just about creating art; it’s about ensuring it lasts.
Calculating Ratios by Weight vs. Volume
When it comes to mixing our components, it is essential to decide whether to measure by volume or by weight. While scales are unrivalled for their precision in capturing the exact weight needed for a flawless chemical reaction, graduated cups offer a visual aid that many find intuitive for volume measurements.
Here’s a guide we’ve put together to help you navigate these measurements:
| Resin Brand | Ratio by Weight | Ratio by Volume |
|---|---|---|
| Super SAP CLR | 100 : 47 | 2 : 1 |
| ArtResin | 100 : 83 | 1 : 1 |
| EcoPoxy | 100 : 30 | 2 : 1 |
Keep in mind that temperature and humidity can also affect how resin and hardener interact. Thus, despite precision in measurement, always factor in your work environment. We hope this guide assists you in mixing the perfect batch every time, resulting in resin art that brings both joy and pride.
Working with Temperature: Best Practices
As dedicated crafters, we know that the ambient conditions for resin play a pivotal role in the outcome of our projects. Achieving the ideal curing environment involves a keen understanding of resin temperature management to ensure that our creations set perfectly every time. With this in mind, let’s explore how to fine-tune the resin’s temperature to match our desired results.
Adjusting for Ambient Temperature
Maintaining a consistent ambient temperature can be a challenge, particularly in conditions that stray from the 70F to 80F sweet spot required for most resin applications. If you find your working environment is on the chillier side, be prepared for a slower curing process and a thicker resin consistency. Conversely, warmer conditions can hasten curing and, at times, lead to undesirable effects such as yellowing or distortion.
Heating and Cooling Resin for Optimal Results
When the ambient temperature isn’t quite right, heating resin becomes a tool in our arsenal to manipulate the material’s viscosity. Warming the resin before mixing can make it more pliable and easier to work with. Ensuring the heat is applied evenly is key, just as methods for cooling resin can extend our working time when the heat is up.
To give you a clearer picture, here is the optimal way to manage resin temperature:
- For thick resin: Gently heat in a water bath until it reaches a more workable consistency.
- For fast curing: Cool resin bottles in a refrigerator before use to slow down the chemical reaction.
- For environmental control: Use a space heater or air conditioner to maintain the room at the ideal temperature range.
Remember, patience is essential, and a little temperature tweaking goes a long way in the realm of resin crafting. By mastering these techniques, our projects are bound to turn out impeccable.
Dealing with Bubbles in Mixed Resin
When venturing into the world of resin crafting, resin bubble removal and achieving bubble-free resin are among the nuances that can make or break the final presentation of your artwork. In this section, we’re tackling one of the quintessential aspects of resin troubleshooting: managing the pesky problem of bubble formation.
| Causes of Bubble Formation | Preventive Measures | Bubble Removal Techniques |
|---|---|---|
| Working temperature below 70F | Ensure ambient temperature is within the ideal range | Use a heat gun to gently warm the surface |
| Coating thickness exceeds recommendations | Apply resin in layers stipulated by the product guidelines | Pass heat over each layer before adding the next |
| Vigorous mixing techniques | Mix slowly and deliberately to avoid introducing air | Allow resin to sit before pouring to let bubbles rise naturally |
Without a doubt, one of the most effective bubble vanquishing tools is the heat gun. A heat gun enables us to carefully warmth the surface of the freshly poured resin, encouraging those stubborn air pockets to ascend and burst, leaving behind the pristine clarity every craftsperson aspires to. However, it’s important to remember to wield this tool with a light touch — overuse can lead to unintended consequences, such as scorching the resin or introducing yet more bubbles. Let’s aim for patience and finesse as we apply heat to secure that perfectly bubble-free finish.
Remember, our goal is to execute a flawless finish and what seem like small details in the process of bubble management could make a major impact. The above advice, coupled with hands-on experience, will guide us towards mastering the wonderfully clear and smooth results we desire, turning resin project pitfalls into perfection.
Adding Inclusions and Embedding Objects in Resin
Embarking on a resin project offers an open canvas to incorporate our creative flair. Through embedding techniques and the strategic inclusion of various materials, we can fabricate custom resin designs that are not only visually striking but carry a personal touch. Let’s delve into the world of inclusions in resin and uncover how timing and material choice can lead to astonishing effects.
Timing the Addition of Inclusions for Best Results
Patience in crafting with resin is a virtue, especially when adding inclusions. We recommend waiting until after your resin is in the mold—and getting accustomed to its new home—before you start your artistry. This prevents premature sinking of the inclusions to the bottom and ensures they remain suspended, offering depth and complexity to your masterpiece. But remember, don’t dally! You want to work before the resin starts curing to avoid a rigid, unworkable interface.
Creating Unique Effects with Various Materials
Unleash creativity by integrating an array of inclusions, from the shimmery glitter to the earthly charm of seashells, each lending a distinct texture and narrative to your resin creation. The technique of layering these elements from the finest glitter to larger pieces such as flowers or leaves is not only a feast for the eyes but also creates a sense of movement within the resin. And here’s a pro tip: consider embedding items that carry meaning or tell your story—because every piece you make should be a reflection of your journey.
- Fine glitter – casts a subtle sparkle and fills tiny gaps.
- Flakes and foils – add reflective properties and visible texture.
- Beads – can create a 3D effect when strategically placed.
- Precious keepsakes – embed a piece of your story right in the resin.
| Material | Effect on Resin | Best Used For |
|---|---|---|
| Color Pigments | Vibrant tones | Color-themed pieces |
| Dried Flowers | Natural aesthetics | Botanical designs |
| Photos or Paper | Personalization | Memory keepsakes |
| Metallic Elements | Luxe finish | High-end decor items |

As we fold these various materials into our work, it’s akin to painting with solids and textures, where every inclusion plays its part in the bigger picture. Creating with resin isn’t just crafting—it’s storytelling, encapsulating moments and assembling a narrative in a solid, yet dreamlike, form.
Ensuring Proper Curing Time and Conditions
The resin curing process is a delicate journey from fluid beauty to rock-solid artistry. It demands our attention to detail and an understanding of the environmental factors that influence it. When we embark on a resin project, ensuring a flawless cure is paramount to transform our creative visions into tangible, long-lasting pieces.
Curing Time Variations for Different Resin Types
With an array of resin types at our disposal, each has its own prescribed curing timeline that can span from 24 to a full 48 hours. Thoroughly assessing resin cure during this period gives us the insight needed to yield optimal results. Whether we are working with a standard epoxy or a UV-cure resin, patience is as much a tool as the resin itself. Recognizing the time variations ensures that each piece gets the chance to fully materialize into the hard, clear finish we aim for.
Troubleshooting Under-Cured or Tacky Resin
Occasionally, we may encounter the challenge of sticky or under-cured resin, which can stem from factors such as incorrect ratios or insufficient mixing. Fixing sticky resin might seem like a daunting task, but it’s often a fixable hiccup in the process. Sometimes a slight increase in room temperature can coax the reaction back to life, paving the way for a successful cure. Here’s a handy table to guide us through common curing problems and solutions:
| Issue | Cause | Possible Solution |
|---|---|---|
| Sticky Surface | Improper mixing ratio | Check and adjust ratios for the next attempt |
| Soft Cure | Low ambient temperature | Move project to a warmer room or use a heat source to encourage the cure |
| Uncured Patches | Inadequate mixing | Ensure thorough mixing, scraping sides and bottom of the mixing container |
Remember, every resin artist has faced the trial of an under-cured piece at some point. We arm ourselves with knowledge, patience, and a bit of troubleshooting prowess to overcome these issues and emerge with perfectly cured masterpieces.
Navigating Advanced Resin Techniques and Projects
Embarking on the journey of advanced resin crafting, we’re moving beyond the basics and into the realm of the extraordinary. This world brims with possibilities for transforming simple resin into awe-inspiring works of art. It’s here that we begin to experiment with complex resin techniques and undertake professional resin projects that stand out in their level of detail and innovation.
One of the first techniques we explore is the art of layering. This process involves pouring resin in stages, allowing each to partially cure before adding the next — creating depth and movement within the piece. But patience is key, as premature pouring can lead to undesired blending or air pockets, detracting from the final creation’s intricate beauty.
To capture the true essence of our artistic vision, we utilize different molds. Whether casting large geometric pieces or intricate bangle bracelets, selecting the right mold opens up a world of textural opportunities and shapes that can be further enhanced by a wide spectrum of colors and additives.
- Transparent dyes for that glass-like clarity
- Metallic powders for a shimmering, reflective finish
- Matte pigments to achieve depth and pastel tones
Additionally, we push the boundaries of creativity by incorporating a variety of elements into our resin. Suspended flowers, foils, and even LED lights all become part of the exquisite narrative told by each finished piece.
No two resin crafts are the same, much like the varying conditions we work under. Humidity, temperature, and even the altitude at which we create can affect how resin behaves. Mastering these conditions ensures that we’re not just following the crafting process but choreographing it to produce exceptional and noteworthy designs.
In essence, the art of advanced resin crafting is much like conducting an orchestra, with each instrument playing a critical role. It’s the understanding of every nuance, from the temperature of our workspace to the manner in which we add our tactfully chosen inclusions, that elevates our craft. Practice, patience, and a passion for pushing boundaries underpin the success of our most complex resin techniques and most professional resin projects.
Conclusion
Embarking on a journey of mastering resin art is both a meticulous and enriching process. It starts with the very foundation of learning how to mix resin correctly. Each phase, from precise measuring to thoughtful mixing and the application of patience during the cure time, plays an essential role in the crafting of successful resin mixtures. We’ve seen that the integrity of our work depends not just on the steps we follow, but also on our ability to adapt to factors such as ambient temperature and the critical resin to hardener ratios that ensure the final piece’s beauty and durability.
Throughout our resin art journey, we’ve witnessed firsthand every effort that goes into perfecting this craft, and how it culminates in the creation of stunning pieces that reflect our dedication and eye for detail. The multitude of variables, from choosing the right kind of resin to adjusting for environmental conditions, are all parts of the larger puzzle we piece together in our quest for excellence. And in doing so, we don’t just create art, we also imbue our lives with the vibrancy and richness that comes from bringing our imaginative visions to reality.
Whether we start with a simple task like creating a resin coaster or advance towards more intricate art pieces, the art and craft of working with resin remains a genuinely rewarding endeavour. With each step we take, we learn, evolve, and enhance our crafting capabilities, chiselling away at the barriers between dreams and reality. It’s a path replete with challenges but equally laden with triumphant moments that keep us passionate about this art form. Join us as we continue to explore, invent, and refine the world of resin art together.
FAQ
What are Part A and Part B in a resin kit?
In a resin kit, Part A refers to the epoxy resin itself, and Part B is the hardener. When mixed together in the correct ratio, they cure and form a solid material.
How do I choose the right type of resin for my project?
Consider the scale and intricacy of your project. For large casts, a deep pour resin may be ideal, whereas for smaller items like jewelry, you might need a resin formulated for fine detail work. Always check the resin’s properties, such as curing time and viscosity, to match your project needs.
What’s the best environment for crafting with resin?
A well-ventilated space is essential, preferably with access to fresh air to avoid inhaling fumes. Also, the area should be dust-free and at a stable temperature, ideally between 70F and 80F, to ensure optimal curing conditions.
What tools and safety gear do I need for resin crafting?
Essential tools include silicone molds, mixing cups, a heat gun, and stirring sticks. For safety, wear nitrile gloves, a respirator or mask, and safety glasses. Cover your workspace with freezer paper or a silicone mat for protection and easy cleanup.
How do I measure resin accurately?
Use clean mixing cups, sticks, and a digital scale or graduated cylinders for precision. Measure by weight or volume according to your resin’s instructions, taking into account the different densities of epoxy and hardener.
What techniques can I use for mixing resin properly?
Use a clean, clear container and stir the resin and hardener together gently but thoroughly for about 2 to 3 minutes, scraping the sides and bottom. Transfer to a second container and mix again to eliminate any streaks and ensure a consistent blend.
How do I deal with different hardener to resin ratios?
Each brand of resin may have a unique mix ratio. Always follow the manufacturer’s instructions, and use accurate measuring tools, like a scale for weight-based ratios or graduated cups for volume-based ratios. Reference charts or online calculators can also help ensure correct proportions.
What’s the role of temperature in resin crafting?
The curing process is heavily influenced by temperature. Aim to work at an ambient temperature of 70F-80F. If the resin is too thick, warming it slightly can reduce viscosity. Conversely, if you need to slow down the curing process, cooling the resin might help.
How can I remove bubbles from my resin mix?
After pouring the resin, gently pass a heat gun over the surface to pop any bubbles. Make sure not to hold the gun too close or in one spot for too long to avoid overheating the resin. Slow and deliberate mixing also helps to minimize bubble formation.
When is the best time to add inclusions like glitter or flakes to resin?
Add your inclusions after pouring the resin into the mold but before it begins to cure. Layer from smallest to largest particles for maximum impact. Ensure the inclusions are well-distributed and positioned correctly for the best visual effect.
How do I know if the resin is fully cured and what should I do if it’s not?
Resin typically needs 24 to 48 hours to cure. If the resin is sticky or tacky, this could signal an incorrect mix ratio, insufficient mixing, or that the ambient temperature was too low during curing. Sometimes, raising the temperature can help complete the curing process.
How can I advance my resin crafting techniques?
Once you’ve mastered the basics, try experimenting with different molds, colors, and textures. Layering resin, creating gradients, or even encapsulating objects can elevate your projects. Remember that practice and patience are key to mastering more complex techniques.
Source Links
RELATED POSTS
View all